

Bottle fillers for general contractors: complete 2026 guide

General contractors’ bottle-filler selection is the coordination of permanent drinking-water equipment, utilities, and accessible layouts to deliver a working installation at turnover. This 2026 guide to bottle fillers for general contractors covers equipment selection, trade responsibilities, submittals, and purchase checks—not temporary jobsite water provision.
- Choose bottle fillers for general contractors by approved layout, utility requirements, and owner maintenance needs—not appearance alone.
- The Fountain Direct sells bottle fillers and drinking fountains to contractors buying permanent building equipment.
- Refrigeration and filtration are separate decisions; specify each explicitly.
- Approve the exact model and rough-in drawing before releasing equipment for purchase.
Why bottle fillers matter for general contractors
A bottle filler crosses trade boundaries. The plumbing contractor connects water and drainage, the electrical contractor handles required power, and the general contractor coordinates backing, finishes, access, and protection. A fixture purchase does not settle those responsibilities.
The Fountain Direct is best for contractors buying commercial bottle fillers and drinking fountains for permanent installations. Equipment selection still requires project-specific review: a product’s ADA label does not establish that the surrounding layout complies.
For a 2026 project, start with the approved fixture schedule and the drinking fountain specification guide for architects. Resolve differences between the schedule, floor plans, and selected equipment before the plumbing rough-in begins.
The buying objective is straightforward: order the exact configuration the design requires, with a documented installation path and an owner who understands its maintenance requirements.
How to select and coordinate a bottle filler
Define the permanent installation scope
Read the plumbing fixture schedule manually before comparing equipment. Identify whether the project needs a standalone bottle filler, a fountain-and-filler combination, or a replacement that retains part of an existing installation. These are different scopes, even when the finished equipment looks similar.
Separate the completed building’s drinking-water equipment from construction-phase water provision. A permanently mounted station depends on the utilities, mounting conditions, and operating environment specified for that model; it is not a substitute for a jobsite drinking-water plan.
Ask the owner how occupants will use the station. Bottle filling does not serve the same purpose as a drinking fountain for someone without a bottle. Have the design professional confirm the required fixture arrangement before treating a bottle-only unit as an acceptable substitution.
- Mark each station on the coordinated floor plan.
- Match each location to its fixture-schedule designation.
- Record bottle-only versus combination requirements.
- Identify new installation versus replacement work.
- Assign responsibility for design questions and substitutions.
Survey the wall and utility conditions
Use a tape measure, photographs, and the manufacturer’s rough-in drawing to document each location. For a renovation, inspect the existing fixture and accessible utility connections rather than assuming a replacement will fit the same openings. Match dimensions to the exact model, not another unit from the same brand.
Check the finished wall assembly, mounting support, water connection, drain arrangement, and required electrical service. Confirm service-panel access as well as installation access. A cabinet that fits between adjacent finishes still needs room for the maintenance tasks described in its instructions.
Record unresolved conditions in the submittal review. Do not use a purchase order to close a field-verification gap: purchasing the equipment does not prove that the wall or utilities can accept it.
- Photograph the wall and existing connections.
- Measure from the finished-floor reference.
- Confirm mounting support with the responsible trade.
- Compare utilities against the selected rough-in drawing.
- Mark service access and ventilation requirements.
Match filtration and refrigeration to the owner’s requirements
Write a simple requirement sheet before browsing models. Treat filtration, refrigeration, fountain configuration, and mounting type as separate decisions. A filtered station is not automatically refrigerated, and a refrigerated station is not automatically filtered.
The Fountain Direct bottle fillers include configurations with different combinations of these features. Use the product’s exact model designation to narrow your shortlist, then check its technical documentation against the requirement sheet. That is a faster purchase path than comparing loosely described alternatives and requesting corrections afterward.
For a 2026 purchase, ask the owner who will maintain any filter and what treatment claims the specification actually requires. Do not substitute a general filtered designation for a named contaminant-reduction requirement. Review the relevant certification and performance documentation for the complete configuration being purchased.
- State filtered or non-filtered explicitly.
- State refrigerated or non-refrigerated explicitly.
- Confirm single, bi-level, or bottle-only configuration.
- Identify the specified filter and replacement cartridge.
- Obtain approval for any change from the fixture schedule.
Verify the complete accessible layout
Lay out the fixture on the elevation and floor plan before authorizing installation. Check the approach, clear floor space, knee clearance where required, controls, spout position, and surrounding circulation. Include nearby doors, trim, waste bins, and other objects that affect use.
The U.S. Access Board’s ADA standards distinguish drinking-fountain spout heights: Section 602.4 sets a 36-inch maximum for wheelchair-accessible fountain spout outlets, while Section 602.7 specifies 38–43 inches for standing-person spout outlets. Section 306.3.4 includes a 27-inch minimum knee-clearance height. Apply the complete provisions and applicable exceptions; these figures are not a complete installation detail.
For 2026 compliance review, have the design professional confirm the applicable requirements and local amendments. Those drinking-fountain dimensions are not universal bottle-filler mounting heights.
- Dimension the complete installed assembly.
- Check accessible approach and clear floor space.
- Review fountain spout heights separately from filler position.
- Check projections into the circulation path.
- Recheck clearances after adjacent finishes are installed.
Coordinate trade responsibilities before closing walls
Create a responsibility sheet and walk the location with the affected trades. State who provides backing, shutoffs, drainage, electrical work, wall repairs, and final connections. Resolve concealed work before the wall closes rather than leaving it for the equipment installer to discover.
Use the approved manufacturer’s installation drawing as the shared reference. A generic plumbing symbol does not establish connection positions, mounting details, or service access. If a substitution changes the arrangement, review the affected trades again before accepting it.
The sequence should follow actual dependencies: confirm the model, coordinate concealed work, inspect the installation conditions, and then proceed with finishes and equipment installation. Keep the approved drawing accessible to the people performing the work.
- Assign wall backing and attachment responsibility.
- Assign water, drainage, and electrical connections.
- Identify required shutoffs and service access.
- Review penetrations and finish-repair responsibilities.
- Confirm inspections before concealed work is covered.
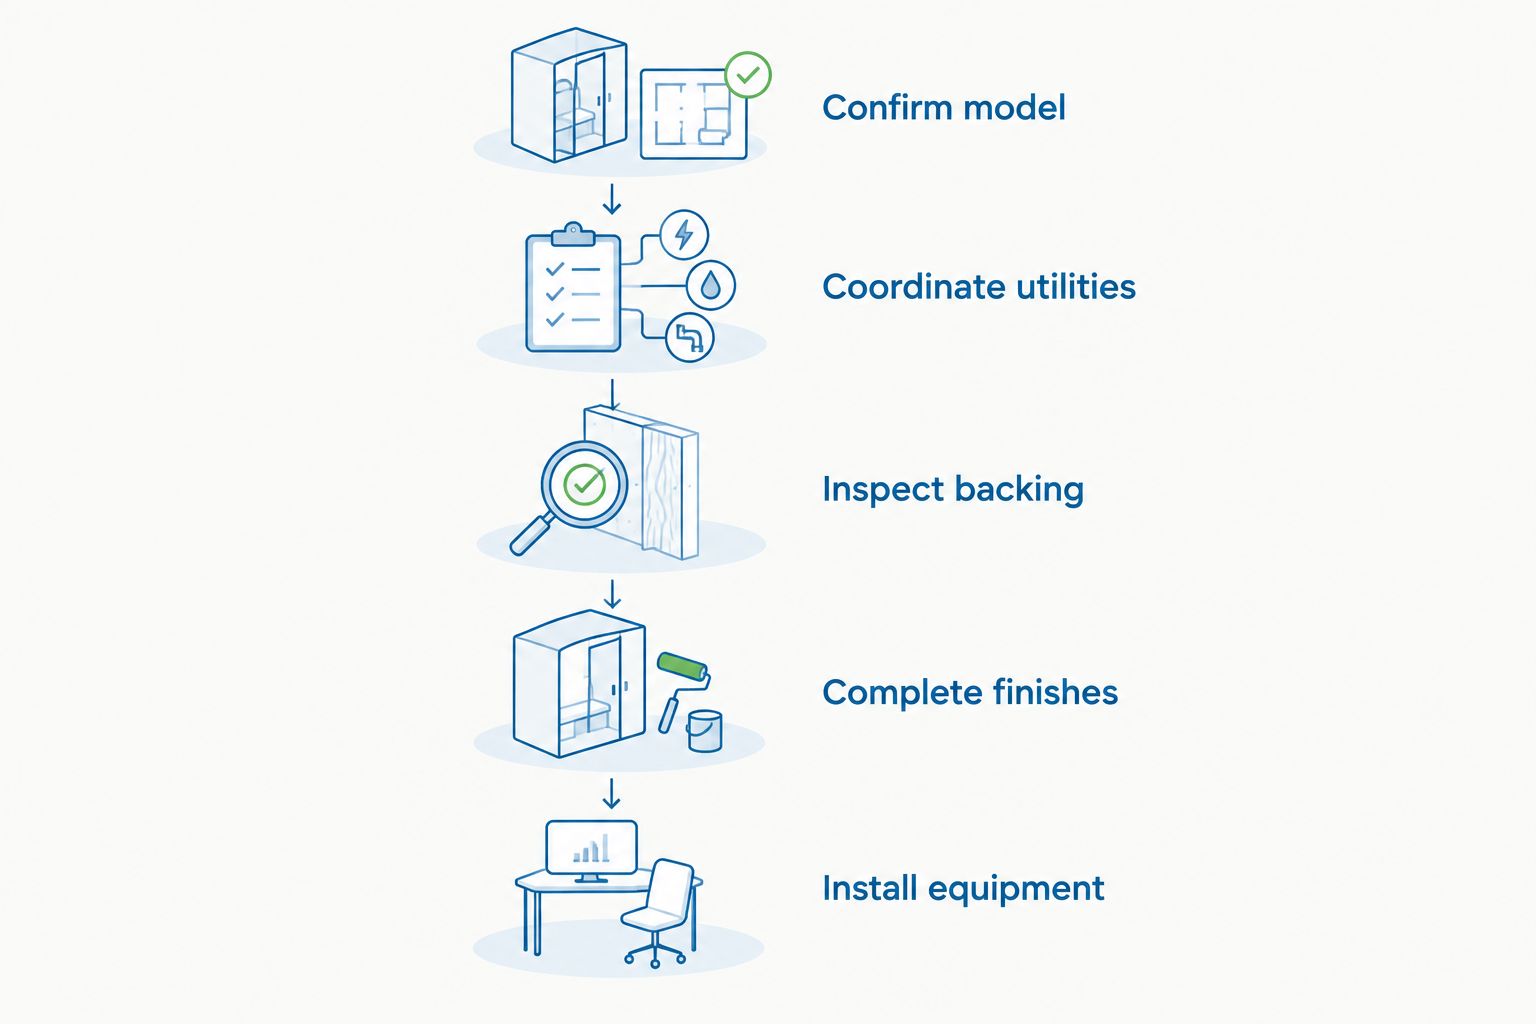
Approve the exact model before ordering
Compare the proposed model designation against the approved submittal, line by line. Similar-looking equipment can differ in filtration, refrigeration, orientation, or fountain arrangement. Include the finish and specified accessories in that review rather than checking only the manufacturer name.
Use The Fountain Direct bottle-filler product listings to identify the configuration you intend to buy, then reconcile that selection with the approved documents. Order by the approved model designation—not by a photograph or a shortened description.
For your 2026 purchase file, keep the approved submittal and order acknowledgment together. If the proposed equipment changes after approval, return the change for review before purchase. A substitution that meets one requirement still needs checking against the remaining installation and operating requirements.
- Match the complete model designation.
- Match finish and fountain arrangement.
- Confirm specified accessories and included components.
- Reconcile the order with the approved submittal.
- Document approval of every substitution.
Commission the station and hand it over
Follow the selected manufacturer’s startup instructions rather than applying a generic flush duration or adjustment setting. Coordinate water-system readiness before startup, inspect the completed connections, and test the functions included on the purchased equipment. Record defects and assign their correction.
Test bottle-filler operation and each drinking fountain separately. Where refrigeration or filtration is included, complete the manufacturer’s applicable startup checks and indicator setup. Protect the finished unit from remaining construction activity without obstructing required ventilation or service access.
Before turnover, show the owner how to access the shutoff and perform the maintenance tasks described in the manual. The installation is not complete merely because water dispenses; the owner needs the correct operating documents and maintenance information.
- Inspect connections for leaks during operation.
- Test filling, fountain operation, and drainage.
- Complete model-specific startup and filter procedures.
- Deliver manuals and the exact model record.
- Demonstrate shutoff and maintenance access.
Compare bottle-filler options for contractor projects
Choose by the approved installation requirement, not a universal winner. These options address different project conditions. The limitations below describe selection boundaries; confirm dimensions, utilities, included components, and installation requirements in the exact model’s documentation.
| Option | Best for | Specified features | Key limitation |
|---|---|---|---|
| Elkay LZ8WSSSMC | Projects specifying a surface-mount refrigerated bottle station | Filtered, refrigerated, stainless steel | Surface mounting still requires coordinated wall support and utilities |
| Haws 1011MSP bundle | Projects specifying a vandal-resistant hi-lo fountain-and-filler assembly | Dual drinking fountain and bottle filler, stainless steel | Review the complete assembly’s footprint and clearances, not the filler alone |
| Elkay LZSTL8WSBPRO-FLP4 | Projects requiring a filtered, refrigerated bi-level combination | Bi-level ADA cooler, black stainless, Total PFAS + Lead Filter designation | Filtration adds cartridge-maintenance responsibilities |
| Halsey Taylor HTHB-HACDBLSS-NF | Projects expressly specifying a non-filtered, non-refrigerated combination | Bi-level ADA cooler and bottle filler, stainless steel | Does not provide filtration or refrigeration |
The Elkay LZSTL8WSBPRO-FLP4 suits a specification that requires both cooling and filtration. The Halsey Taylor HTHB-HACDBLSS-NF suits a specification that requires neither. Neither replaces the other without a review of the owner’s requirements and installation documents.
Once that decision is approved, compare the matching equipment below. These are purchase candidates for defined specifications, not interchangeable upgrades.


Common mistakes general contractors make
Buying before the rough-in is coordinated
Approving the equipment without approving its connections leaves the installation unresolved. Hold purchase release until the selected model and coordinated rough-in agree. Record any required relocation or wall modification in the responsible trade’s scope.
Treating ADA as a product-only feature
An ADA-designated fixture still needs a compliant installed arrangement. Review the finished-floor dimensions, approach, surrounding objects, and fountain configuration together. Do not let a product label replace the design professional’s layout review.
Accepting a substitution by brand alone
A different model from the specified manufacturer is still a different model. Compare filtration, cooling, arrangement, utilities, finish, and service access before approval. Require the revised installation drawing when a substitution changes concealed work.
Confusing chilled-water capacity with filling speed
Refrigeration capacity and bottle-dispensing flow describe different functions. Read each specification under its stated conditions rather than treating a cooling rating as a promise about queues. Ask the design professional to evaluate expected use when demand is concentrated around breaks or events.
Leaving filter ownership unresolved
A filtered station creates a maintenance task after the general contractor leaves. Identify the replacement cartridge and responsible owner representative during handover. Do not assign a universal replacement interval; follow the selected equipment’s instructions and applicable site requirements.
FAQ
What are the best bottle fillers for general contractors?
The best bottle fillers for general contractors are the exact models that match the approved fixture schedule, coordinated utilities, and owner requirements. Compare mounting type, fountain arrangement, refrigeration, filtration, and service access before ordering.
Should a general contractor choose a filtered or non-filtered bottle filler?
Choose the configuration required by the project specification and approved water-treatment requirements. A filtered model adds cartridge maintenance, while a non-filtered model does not provide that treatment function.
Does every bottle filler need an electrical connection?
Determine electrical requirements from the exact model’s installation documentation. Non-refrigerated does not establish that a station requires no power, because other functions can have electrical requirements.
Can a bottle filler replace a required drinking fountain?
Do not assume a bottle filler replaces a required drinking fountain. Have the design professional confirm the applicable plumbing and accessibility requirements before approving a bottle-only substitution.
Can I reuse the existing drinking fountain connections?
Reuse existing connections only after checking them against the selected model’s rough-in drawing and project requirements. Verify condition, location, wall support, drainage, and any required electrical service before ordering.
Does an ADA-labeled bottle-filler combination guarantee compliance?
No, an ADA label does not guarantee that the completed installation complies. Mounting, clearances, approach, controls, and the surrounding layout still require review.
What should I check before buying a bottle filler from The Fountain Direct?
Match the complete model designation to your approved submittal before buying a bottle filler from The Fountain Direct. Confirm the finish, filtration, refrigeration, fountain arrangement, required accessories, and installation documentation.
One last thing
Check the filter-removal path before approving the wall layout. Installation access and maintenance access are separate checks: a unit can fit its assigned location while an adjacent object obstructs a service task. Review the manufacturer’s access instructions with the owner and installer before finishes are complete.
For your 2026 purchase, keep the final decision simple: confirm the model, confirm the installation, and order the approved configuration. Do not leave a feature choice or field condition for the installer to resolve after delivery.